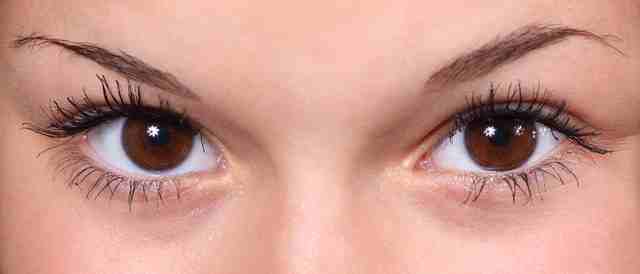
How to Master the Perfect Brow: Preparation, Plucking and Styling
Creating the perfect eyebrows can take preparation, patience and precision; yet once you master the technique they can truly transform your look. The face framers enhance your features, pulling them together effortlessly whilst making a bold yet elegant beauty statement.
So for all the first timers out there, who are guilty of plucking aimlessly; avoid potential disasters by following these simple steps in order to make the most of your beautiful brows!

Shape Up.
This is a vital step towards eye brow success; as if it isn’t done properly it will have a knock on effect to the outcome. Firstly, sweep across your brows with an eyebrow brush, this won’t only establish their natural shape but it will help you separate the strays from your brows, as well as flattening them, both of which makes the plucking process, the next step, easier.
Once you’ve done that it is time to mark out the length and the positioning of the arch. The length is all based on your judgment, just remember they are meant to gracefully line your eyes, so more often than not, they start in line with your tear duct. In regards to the tail , have an experiment yet be realistic; the tail should form into a natural point. Next mark out the structure by placing a dot with an eye brow pencil to form the preliminary length. With the arch, it will form naturally when you lift up the skin above your brows, where it goes into a point mark it with a dot. That’s your first stage complete!
The style of brow you choose is entirely up to you, as different eye shapes and face shapes suit various eye brow types, so be creative!
Time to Tweeze:
So you have now established the shape, I now start the tweezing process by determining the thickness, for example, the width of the brow. Get your pencil draw a line on the lower part, separating the strays from the bulk, I normally do this with the upper part of the brow as well. Once you’ve done this it is visibly clear what strays you need to tweeze out. In regards to the arch, find the dot you made so it can be used as a reference point; remove a row of hairs along the bottom, from your inner brow point to the peak point.
*Top Tip* – To make the experience a little less painful I advise to have a really warm shower just beforehand. I find this alleviates the pain as the heat opens up your pores. Also, while plucking, have a warm damp flannel to hand and keep dabbing it over the brow, it’s soothing but also the warmth dulls the sharp twinges! Here are some other tips for painless plucking for you to try
Fill the Gaps with Style:
Drawing on your eye brows is a no no; I prefer to use the phrase filling in the gaps as the pencil is meant to give your brows a fuller, polished look while defining the shape, not to draw them on! So firstly ensure you have chosen the right shade, then starting from the inside gently glide over your brows towards the outer brow to give definition.
Seal the Deal:
Last but not least, to ensure your hard work doesn’t get ruined as soon as you leave the house, place a thin layer of eyebrow wax over your brow. This wax acts as a fixative, so your precise pencil work doesn’t smudge, and makes your brows maintain a sleek defined look.
Want to learn more beauty tips and tricks? Clare Weyers from Elite School of Beauty is happy to share her advice! Call her now for a chat on this number 01279 755077 or email your query to info@elitebeautyschool.co.uk.

